Simply you can install joomla application very easily, Follow all the steps below.
step-2: Upload joomla 3.0 on Server/Local system
step-3: Create database for joomla 3.0
step-4: Run the joomla 3.0 Installation Wizard
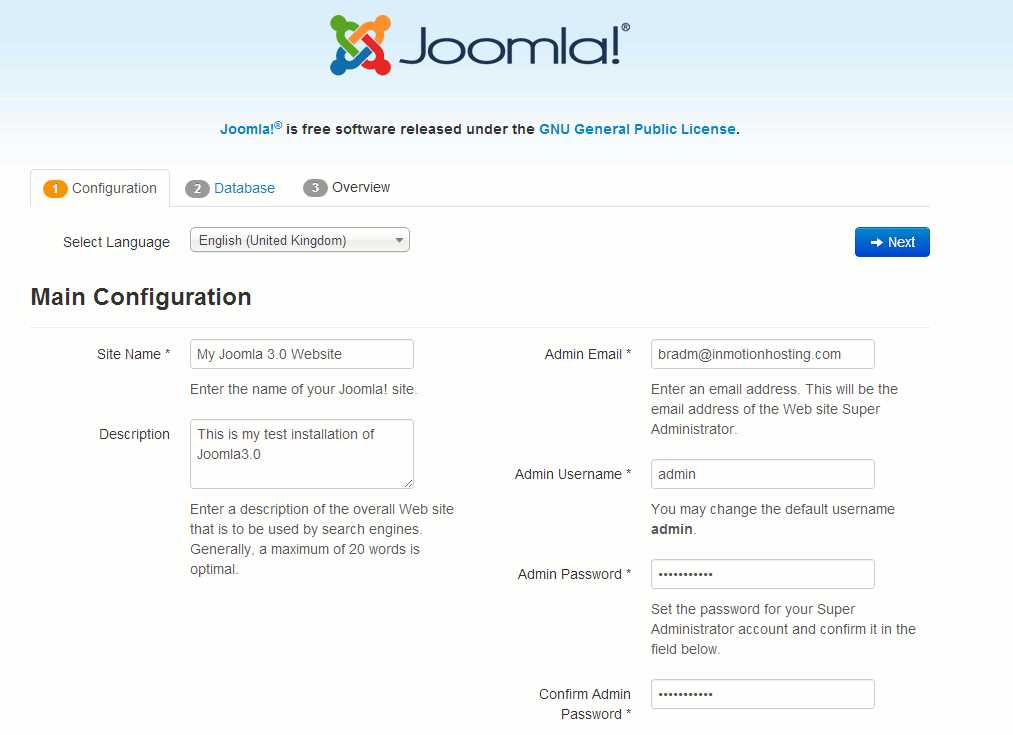 1. Configuration
On the configuration page, you'll need to select your language, enter a name and description for your site, and setup your administrative details (such as username, password, and email address). Click the screenshot to the right to see how we filled out our configuration details. Click Next to continue the installation.
Joomla 3.0 Installation Steps
step-1: Download joomla 3.0
The first step in installing Joomla 3.0 is to actually download it. Visit this page and download one of the compressed versions of Joomla 3.0, either .zip, .tar.gz, or .tar.bz2.step-2: Upload joomla 3.0 on Server/Local system
After downloaded Joomla 3.0, upload it to your server. If your server allows you to uncompress files, then you can save time by uploading the compressed file and then uncompressing it on the server. Otherwise you will need to uncompress the file on your desktop and then use FTP to upload all of the individual files.
step-3: Create database for joomla 3.0
Joomla requires a database for installation. If you are on a cPanel server, use the MySQL Database wizard to setup your new database. If your hosting provider does not use cPanel, you'll need to contact them for the steps on creating a new database.
Be sure to take note of your database name, database username, and database password. You will need these later during the installation.
Be sure to take note of your database name, database username, and database password. You will need these later during the installation.
If you have deployed joomla 3.0 in local system in WWW folder (in wamp server) then no need to create database, first go through browser and type localhost/joomla3.0 and run it then below picture you will see.
step-4: Run the joomla 3.0 Installation Wizard
In our testing we installed Joomla 3.0 into a subfolder named joomla3.0. To access the installation wizard we will go to http://domain.com/joomla3.0
1. ConfigurationOn the configuration page, you'll need to select your language, enter a name and description for your site, and setup your administrative details (such as username, password, and email address). Click the screenshot to the right to see how we filled out our configuration details. Click Next to continue the installation.
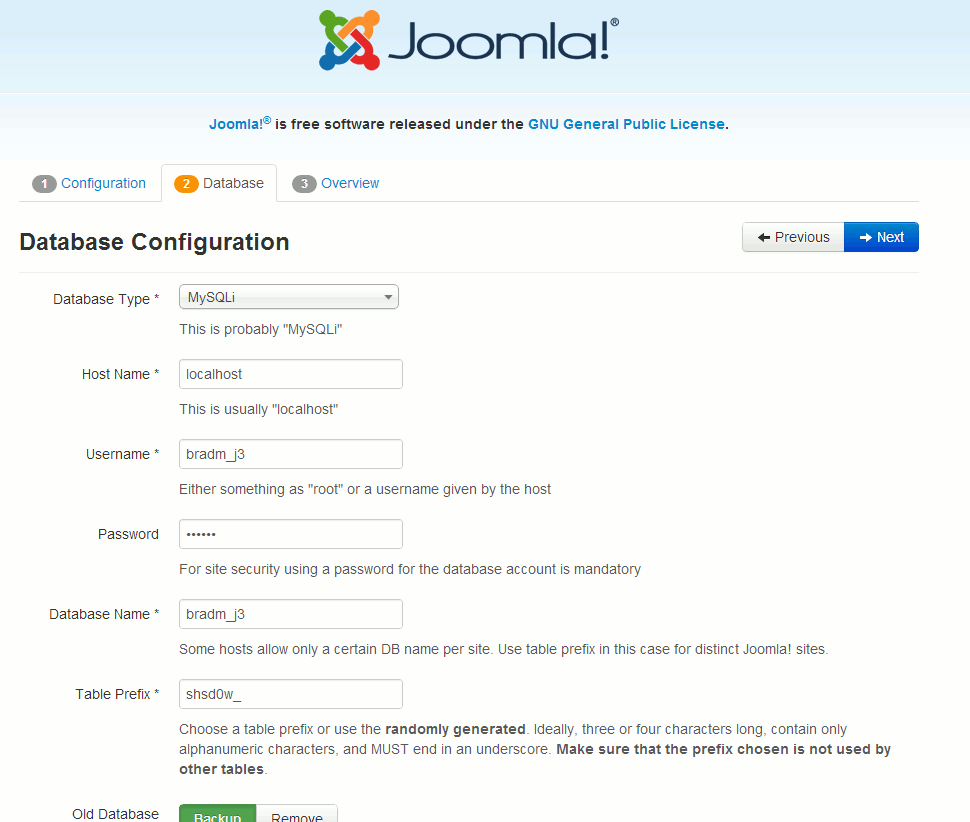 2. Database
In step 2, you will configure Joomla with the database you setup in Step 3 above. On most servers, you can set theDatabase Type to MySQLi and set the Host Name tolocalhost. When finished entering your database credentials, click Next.
and Skip FTP layer.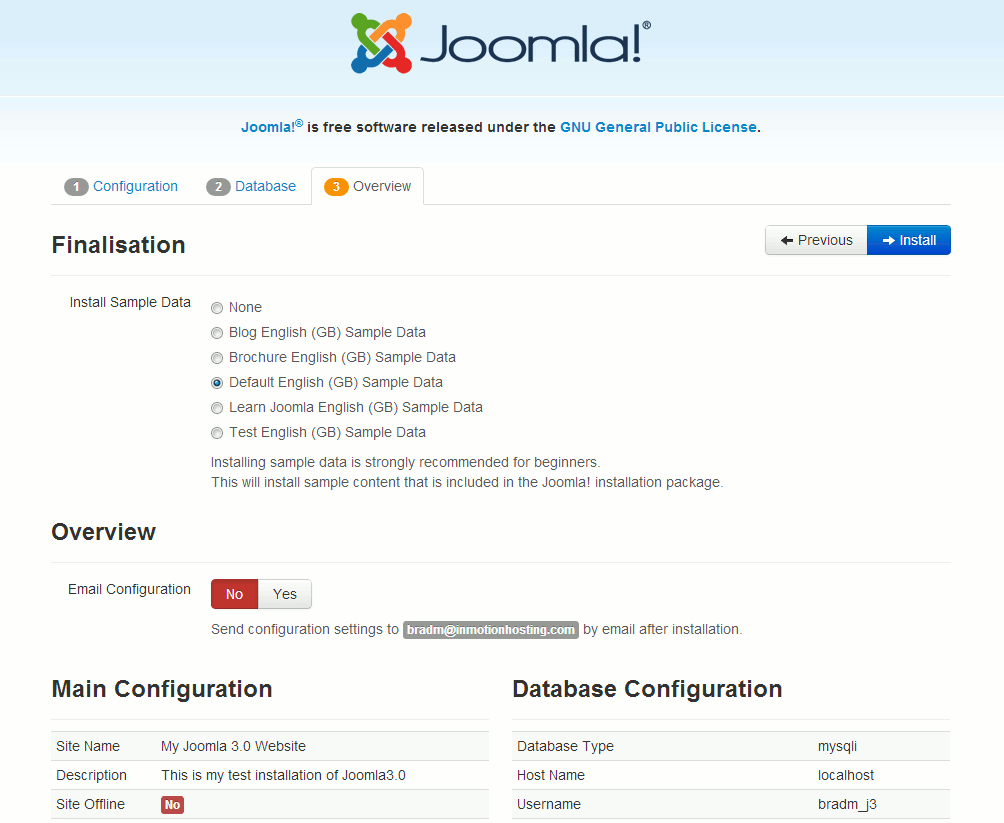 3. Overview
If this is your first time using Joomla 3.0, you may want to use the option to install sample data. This will help you learn how Joomla 3.0 works because your new Joomla website will include sample articles. Also, You can select Yes next to Email Configuration if you want to have a copy of the installation details emailed to you. When finished with this page, click the Install button.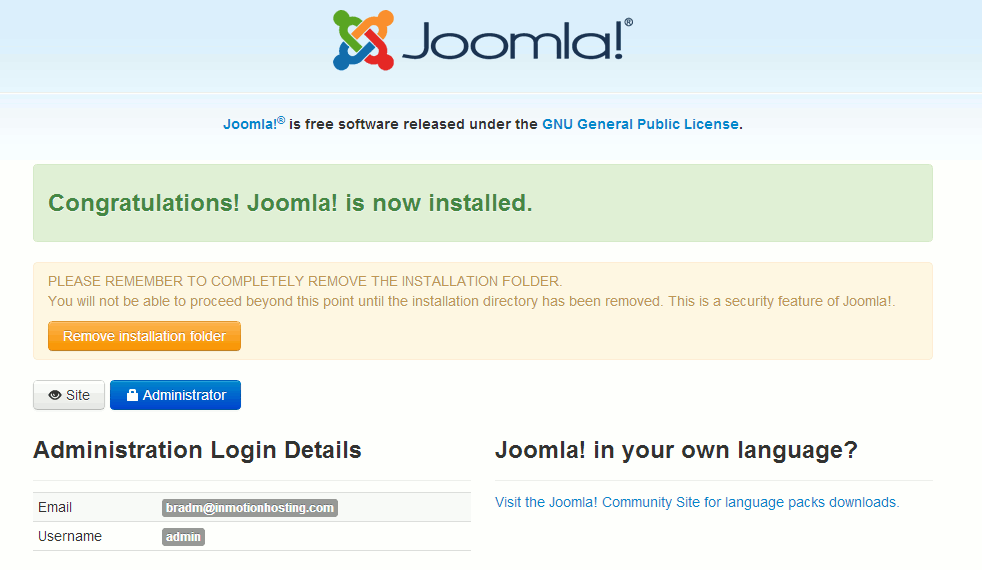 You should then see a success message, stating that Joomla 3.0 has been successfully installed.
At this point, click the Remove installation folder button. Now that you have installed Joomla 3.0, you can then log into your Joomla 3.0 dashboard and begin writing your first articles.
NOTE: After removing manually "installation" Folder If it gives any configuration Error then Create a File with this name "configuration.php" , paste the whole code which is given below picture in "Notice" which is appear after successfully Installation and Put this file inside joomla3.0 folder, and run it (http://domain name/joomla 3.0) ie.(www.example.com/project or localhost/project).

Installation Complete!
No comments:
Post a Comment